Install with Eclipse IDE
These instructions will get you a clean IoT-Testware clone up and running on your local machine for development and testing purposes.
Prerequisites
- Latest version of Java
- Latest version of Python (v2 or v3)
- Latest version of Eclipse Titan. For installation details please consult the official Eclipse Titan
Installing Quickstart
Note: Make sure all prerequisites are met. As we use Eclipse Titan (natively running under Linux) to compile and execute our test suite, the following instruction won’t cover other OS like Windows or MacOS. We recommend installing a Linux derivate in a virtual machine.
Set up
Firstly, you need to get all needed dependencies to run the test suites. To do so, simply run the python script install.py with your protocol of choice:
python install.py -p <PROTOCOL>
This is the most minimalistic way of getting the dependencies. For a more complete explanation of the installation script please refer to the documentation. With Eclipse Titan you are free to choose to work either from the Command Line (CLI) or from Eclipse IDE. Go ahead and read further instructions of your preferred way of working.
Eclipse IDE
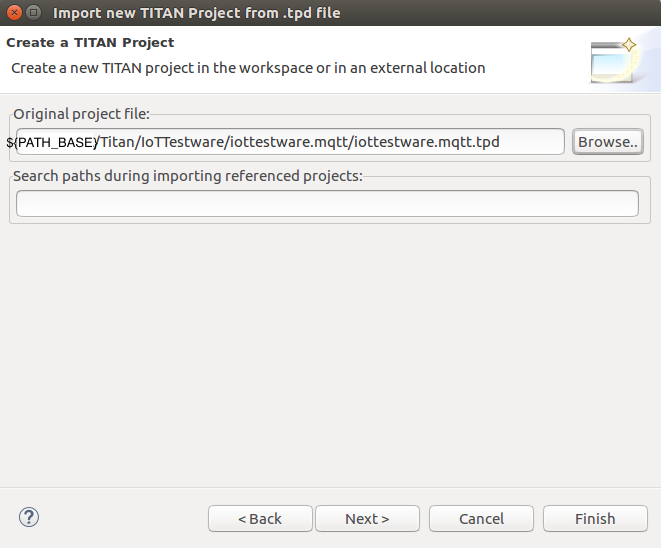
In every of our protocol repositories you find a iottestware.<PROTOCOL>.tpd file that you need to import.
Open the Titan IDE in your desired workspace and use the import feature
File -> Import -> TITAN -> Project from .tpd file

Klick Next and choose the iottestware.<PROTOCOL>.tpd from ${PATH_BASE}
Klick Next and choose importation options.

Klick Finish and the IDE will import all the required Projects and open the properties for each. Make sure each project is configured to _generate Makefile for use with the function test runtime_.

Right-click the iottestware.<PROTOCOL> project and select Build Project.
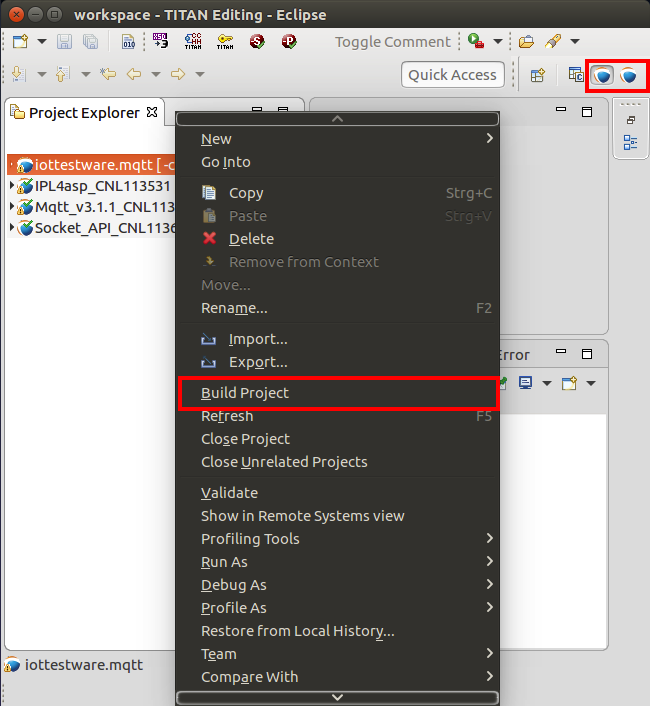
Note: Make sure you are in the TITAN Editing Perspective, otherwise the Build Project might be not available.